If you’ve ever struggled with clunky sprite sheets or time-consuming frame-by-frame animation, Spine offers a different path one that’s faster, more flexible, and built for modern indie workflows.
This isn’t just a tool overview. This is a practical guide to how Spine actually works, how to use it properly, and how to avoid the mistakes that slow most beginners down.
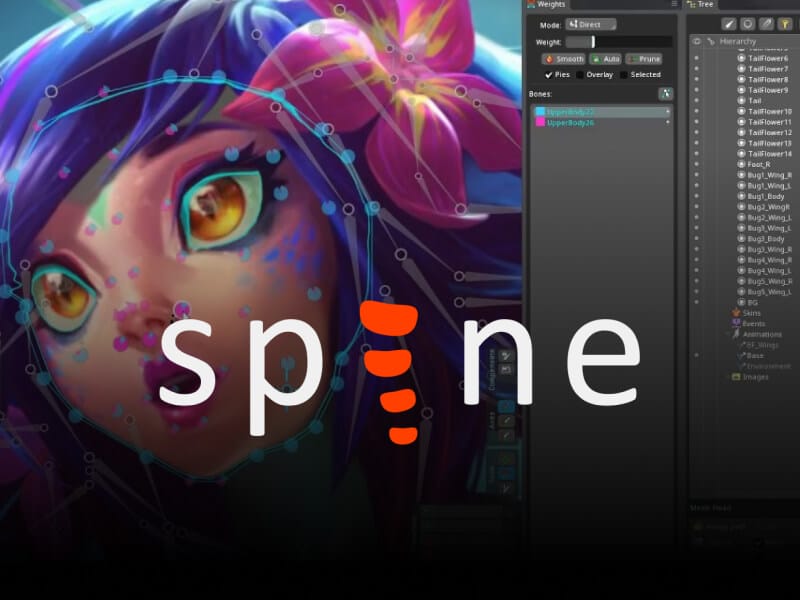
What Spine Actually Does (And Why It Matters)
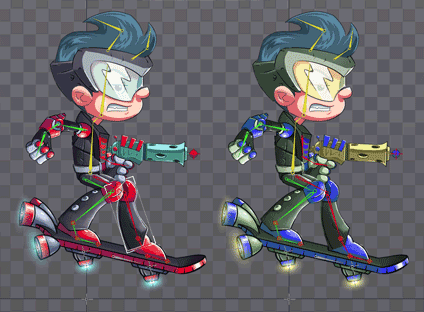
Spine is built around a simple idea: instead of animating frame by frame, you animate a skeleton.
You import your artwork in pieces—head, arms, legs, torso—and attach them to bones. Then you move the bones, and the artwork follows. This allows you to reuse the same assets across multiple animations without redrawing everything.
The result is:
- Smaller file sizes
- Smoother animation
- Faster iteration
For indie developers, that efficiency is a major advantage.
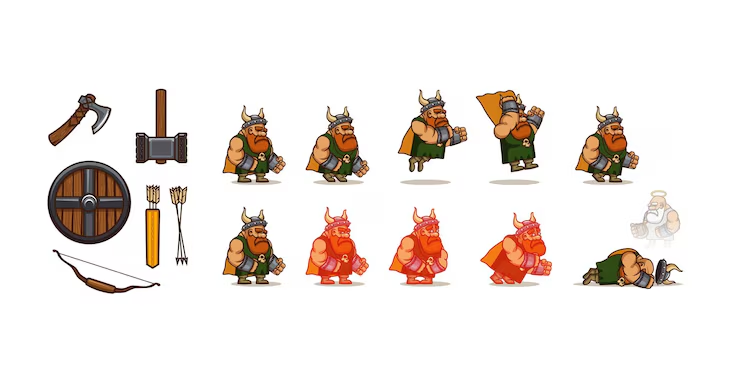
Step 1: Preparing Your Assets the Right Way
Before opening Spine, most of your success depends on how you prepare your art.
Each movable part should be separated into its own image:
- Head
- Upper/lower arms
- Hands
- Torso
- Legs
Keep overlaps in mind. For example, shoulders should extend slightly under the torso so they don’t break when rotating.
A common beginner mistake is exporting a “perfect-looking” character instead of a functional one. In Spine, usability matters more than visual completeness at this stage.
Step 2: Building Your Skeleton
Once your images are imported, you start creating bones.
Think of bones as a hierarchy:
- The root bone controls the entire character
- Child bones follow their parent
- Movement flows from top to bottom
Start simple. Build only what you need—overcomplicating your rig early will make animation harder later.
Focus on:
- Proper bone placement at joints
- Clean parent-child relationships
- Naming consistency
A clean skeleton makes everything else easier.
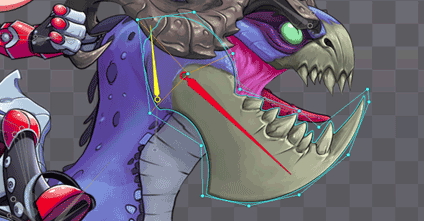
Step 3: Skinning and Weighting
This is where your character starts to feel alive.
Skinning defines how each image reacts to bone movement. You can:
- Attach an image to a single bone (rigid)
- Or blend it across multiple bones (weighted)
Weighted meshes allow for smoother bends, especially for areas like arms, legs, and torsos.
This step takes practice. Poor weighting leads to unnatural stretching, while good weighting creates fluid, believable motion.
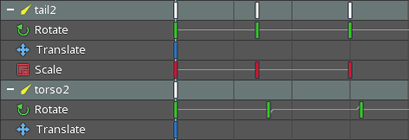
Step 4: Animating with Keyframes
Spine uses keyframe animation. You set key poses, and Spine interpolates between them.
Start with core animations:
- Idle
- Walk
- Run
- Attack
Focus on clarity first, not complexity. A clean, readable walk cycle is more valuable than a flashy but confusing animation.
Use timing and spacing to add personality:
- Faster transitions feel snappy
- Slower easing feels heavier or more relaxed
Animation isn’t just movement—it’s communication.
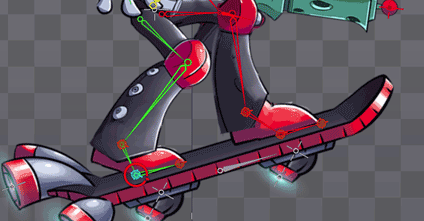
Step 5: Using Constraints for Better Motion
Constraints are one of Spine’s most powerful features—and one of the most overlooked.
They allow you to control how bones behave automatically:
- IK (Inverse Kinematics) for natural limb movement
- Transform constraints for consistent motion
- Path constraints for guided animation
For example, IK can make feet stay planted on the ground while legs move naturally. Without it, you’d have to animate that manually every time.
Constraints reduce work while improving realism.

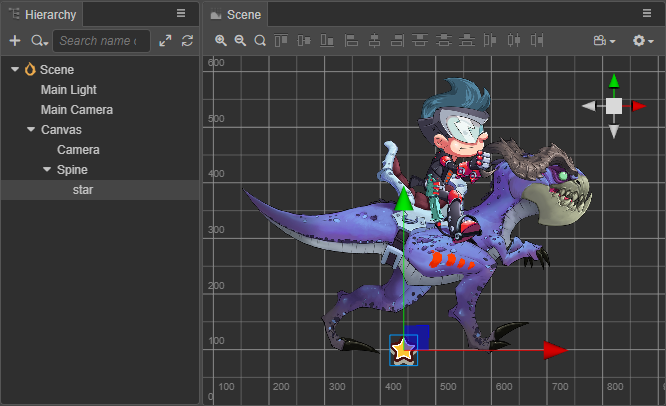
Step 6: Exporting to Your Game Engine
Spine doesn’t work in isolation—you’ll export your animations into engines like Unity or Godot.
The export process includes:
- JSON or binary data (animation + skeleton)
- Atlas files (texture packing)
Each engine has official runtimes that interpret Spine data.
Make sure to:
- Test animations inside your engine early
- Check scaling and performance
- Verify blending between animations
Integration is where many pipelines break—don’t leave it until the end.
Step 7: Optimization for Real Projects
Spine is efficient, but poor setup can still hurt performance.
Keep things optimized by:
- Limiting unnecessary bones
- Reducing overuse of weighted meshes
- Packing textures efficiently
Mobile games especially benefit from clean rigs and smaller atlases.
Common Mistakes to Avoid
Most beginners hit the same issues:
- Overcomplicated rigs too early
- Poor asset separation
- Ignoring constraints
- Focusing on visuals over function
Spine rewards simplicity and structure. The cleaner your setup, the better your results.
Final Thoughts
Spine isn’t just an animation tool—it’s a system that changes how you think about character movement.
For indie developers, it removes one of the biggest bottlenecks in production. You don’t need massive art resources to create smooth, expressive animation anymore.
But like any powerful tool, it only works if you understand the fundamentals.
Start simple. Build clean. Iterate often.
That’s how you go from static sprites to characters that actually feel alive.