Just Got a New USB Mic? Here’s How to Test It Live Without the Hassle
Instead of checking ports, system input levels, or online testing websites, you can use the Live Mic Audio Visualizer

Getting a new USB condenser microphone is exciting — you imagine streaming, podcasting, or recording your voice in crystal-clear quality. But the first few minutes can be confusing: “Is it working? Am I too quiet? Too loud?” Normally, testing a mic involves digging through system settings, plugging and unplugging, or using online tools — and that can be frustrating for beginners.
Good news: there’s an easier, faster way to test your mic live without all the hassle.
Finding Your Sound Settings
Before launching any visualizer, make sure Windows or macOS is listening to the right microphone:
Windows:
- Right-click the little speaker icon on your taskbar → Sound settings
- Look for the Input section
- Find your microphone in the dropdown and select it
Mac:
- Open System Settings → Sound → Input
- Click your microphone from the list of connected audio devices
You’ve now told your computer which mic to listen to. Next, we’ll set the proper input volume.
It can be confusing if you haven’t done this before.
Skip the Complicated Setup
Instead of checking ports, system input levels, or online testing websites, you can use the Live Mic Audio Visualizer (Basic) from GitHub. This tool lets you:
See your voice visualized in real time
Hear your voice with instant reverb effects
Adjust the sound without digging into complicated settings
All of this works right out of the box — plug in your mic, run the program, and start speaking.
What It Does
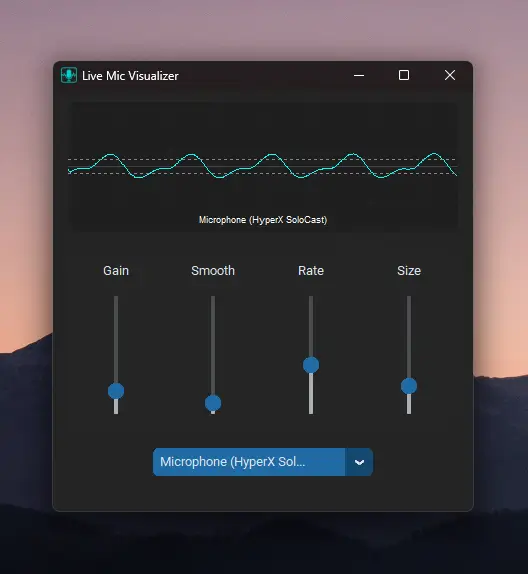
This tool captures your mic input and displays it in a dynamic waveform, letting you tweak audio in real-time:
- Gain – amplify your voice
- Smoothing – make the waveform more fluid
- Sample Rate – adjust microphone sampling
- Block Size – change buffer size for smoother or more responsive visualization
- Stop button – safely stop the audio stream
It’s simple: speak, see the waveform move, and hear your voice in real-time.

Windows Download (No Coding Needed)
I’ve prepared a ready-to-run Windows executable of the visualizer so you don’t need Python or any setup:
Download Link (windows):
https://storage.googleapis.com/42zero-opensource-downloads/LiveMicSetup-v1.3.zip
GitHub Repository (for reference or advanced users):
https://github.com/Rottie420/live-mic-basic
Just download, unzip if needed, and double-click the .exe file. Your mic will instantly be live and visualized.
How to Use
- Plug in your USB mic
- Setup, install and run the app
- Select your microphone
- Adjust sliders to experiment:
- Gain: make your voice louder
- Smoothing: fluid waveform
- Sample Rate: change input quality
- Block Size: control responsiveness
- Watch the waveform react to your voice in real-time
Why This Is Perfect for Beginners
- Instant visual and audio feedback
- Fun and interactive — experiment with your voice safely
- Great first experience with a new USB mic
Your new USB mic isn’t just for recording — with this app, it becomes a live, interactive audio playground. Speak, tweak, and watch your audio come alive immediately.